Introduction:
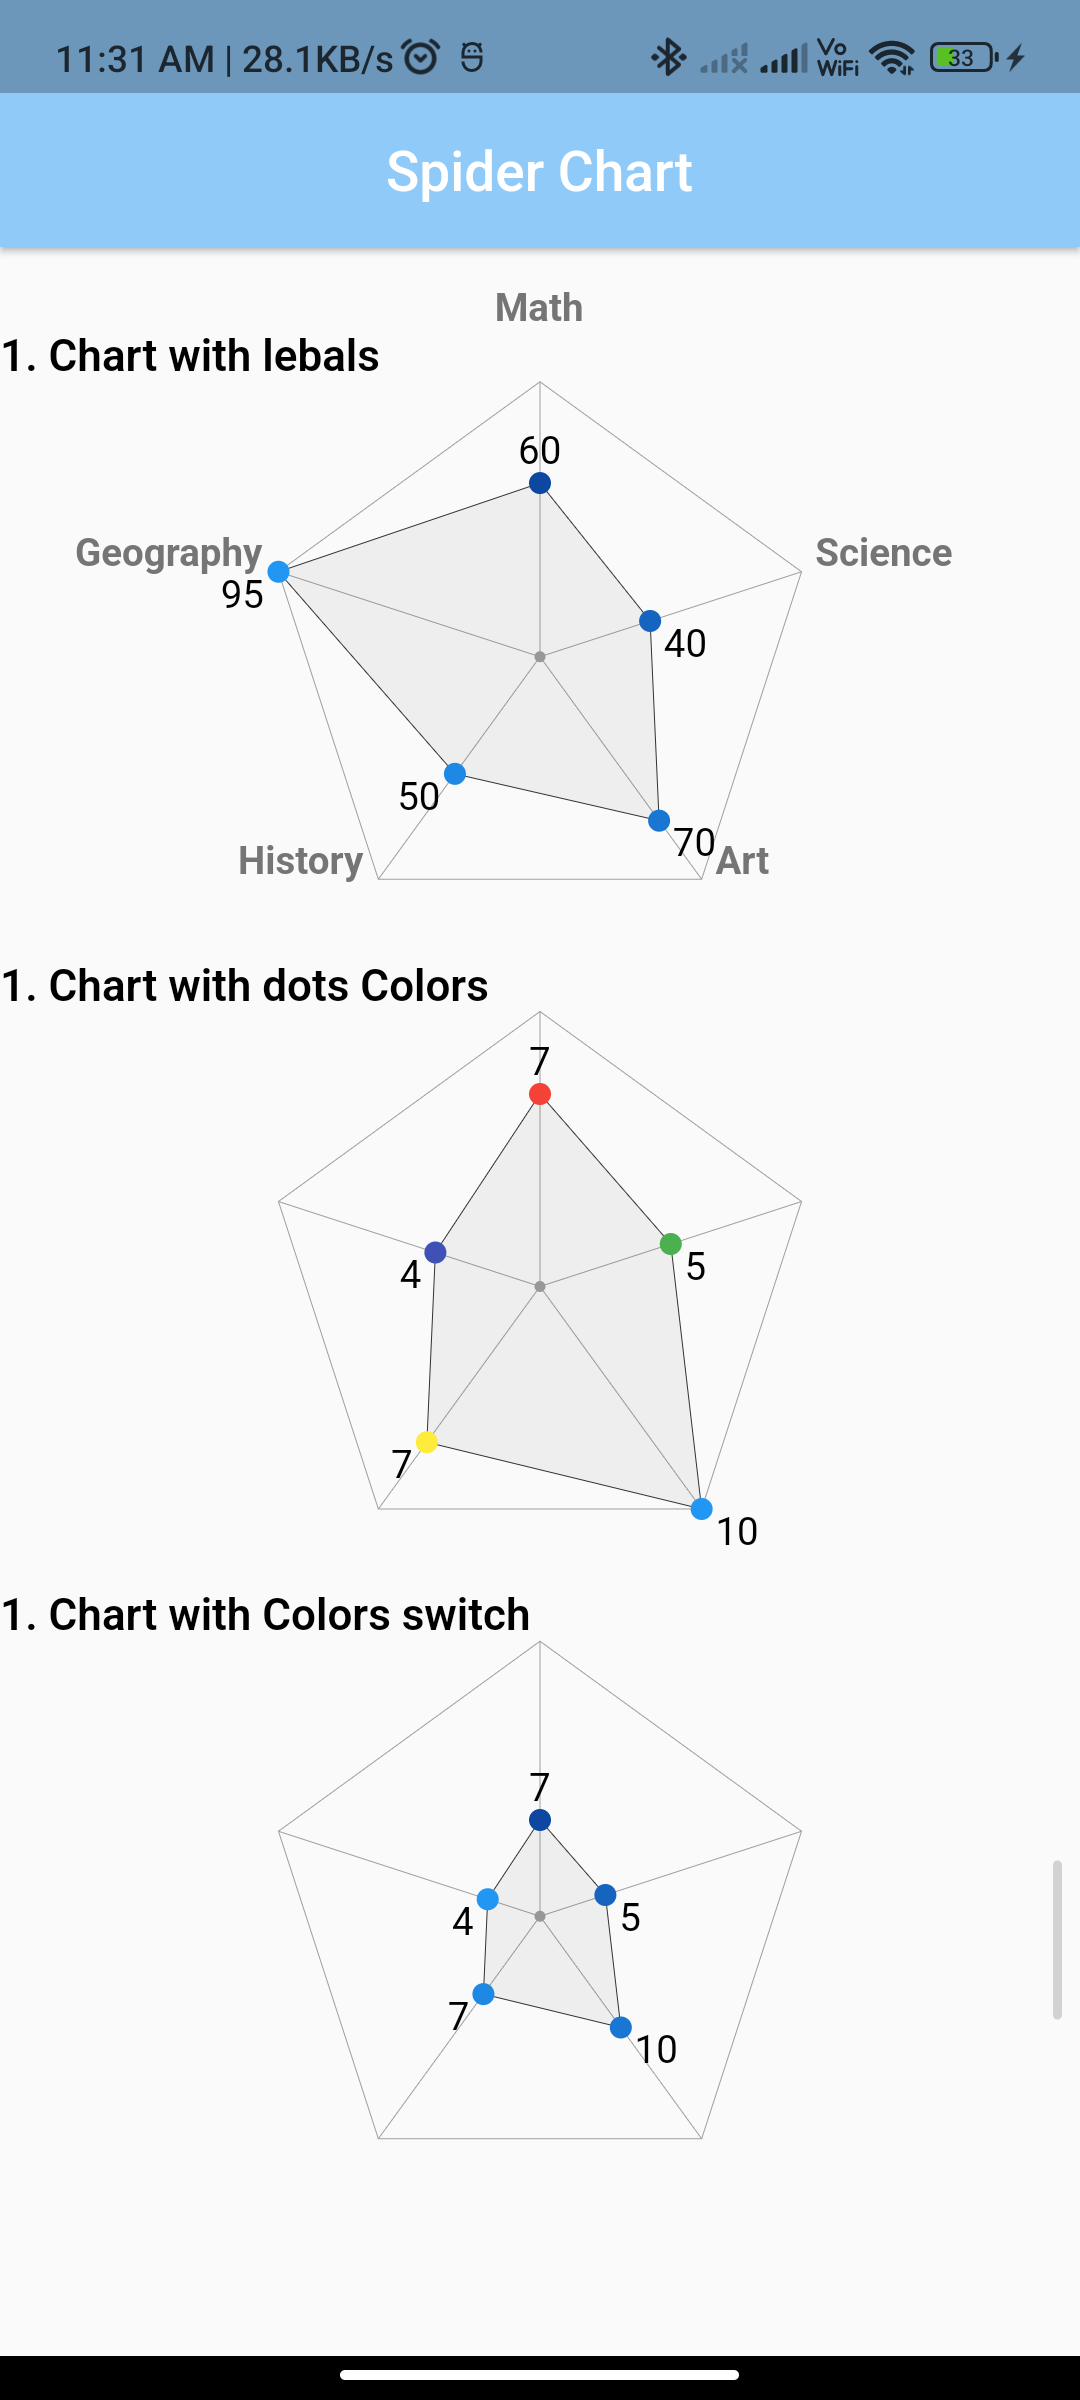
Spider charts, also known as radar charts, are effective for displaying multivariate data in a two-dimensional chart. In Flutter, you can implement a spider chart using the spider_chart package. This step-by-step guide will walk you through the process of creating a spider chart in Flutter.
Content:
Step 1: Create a New Flutter Project
Ensure that you have Flutter installed and set up on your machine. Create a new Flutter project using the following command in your terminal:
flutter create spider_chart_exampleStep 2: Add the spider_chart Dependency
Open the pubspec.yaml file in your Flutter project and add the ‘spider_chart’ dependency:
dependencies:
  spider_chart: ^1.0.2
Save the file and run flutter pub get in your terminal.
Step 3: Implement a Spider Chart in Flutter
Open the lib/main.dart file and replace its content with the following code:
import 'package:flutter/material.dart';
import 'package:spider_chart/spider_chart.dart';

void main() {
  runApp(SpiderChartApp());
}

class SpiderChartApp extends StatelessWidget {
  @override
  Widget build(BuildContext context) {


    return MaterialApp(
      home: Scaffold(
        appBar: AppBar(
          title: Text('Spider Chart Example'),
        ),
        body:     Center(
              child: SizedBox(
                width: 200,
                height: 200,
                child: SpiderChart(
                  data: const [
                    60,
                    40,
                    70,
                    50,
                    95,
                  ],
                  labels: const <String>[
                    "Math",
                    "Science",
                    "Art",
                    "History",
                    "Geography",
                  ],
                ),
              ),
            ),
      ),
    );
  }
}
Step 4: Run the App
Save your changes and run the app using the following command in your terminal:
flutter runSample Code:
// ignore_for_file: prefer_const_constructors, prefer_const_literals_to_create_immutables

import 'package:flutter/material.dart';
import 'package:spider_chart/spider_chart.dart';

class ChartWithLabels extends StatefulWidget {
  const ChartWithLabels({super.key});

  @override
  State<ChartWithLabels> createState() => _ChartWithLabelsState();
}

class _ChartWithLabelsState extends State<ChartWithLabels> {

  @override
  Widget build(BuildContext context) {
    return Scaffold(
      appBar: AppBar(
        centerTitle: true,
        elevation: 2,
        title: Text(
          'Spider Chart',
          style: TextStyle(fontSize: 20),
        ),
        backgroundColor: Colors.blue[200],
      ),
      body: SingleChildScrollView(
        child: Column(
          children: [
            SizedBox(
              height: 30,
            ),
            Row(
              children: [
                Text(
                  "1. Chart with lebals",
                  style: TextStyle(color: Colors.black, fontWeight: FontWeight.w600, fontSize: 16),
                ),
              ],
            ),
            Center(
              child: SizedBox(
                width: 200,
                height: 200,
                child: SpiderChart(
                  data: const [
                    60,
                    40,
                    70,
                    50,
                    95,
                  ],
                  labels: const <String>[
                    "Math",
                    "Science",
                    "Art",
                    "History",
                    "Geography",
                  ],
                ),
              ),
            ),
            SizedBox(
              height: 10,
            ),
            Row(
              children: [
                Text(
                  "1. Chart with dots Colors",
                  style: TextStyle(color: Colors.black, fontWeight: FontWeight.w600, fontSize: 16),
                ),
              ],
            ),
            Center(
              child: SizedBox(
                width: 200,
                height: 200,
                child: SpiderChart(
                  data: const [
                    7,
                    5,
                    10,
                    7,
                    4,
                  ],
                  colors: const <Color>[
                    Colors.red,
                    Colors.green,
                    Colors.blue,
                    Colors.yellow,
                    Colors.indigo,
                  ],
                ),
              ),
            ),
            SizedBox(
              height: 10,
            ),
            Row(
              children: [
                Text(
                  "1. Chart with Colors switch",
                  style: TextStyle(color: Colors.black, fontWeight: FontWeight.w600, fontSize: 16),
                ),
              ],
            ),
            Center(
              child: SizedBox(
                width: 200,
                height: 200,
                child: SpiderChart(
                  data: const [
                    7,
                    5,
                    10,
                    7,
                    4,
                  ],
                  maxValue: 20,
                ),
              ),
            ),
          ],
        ),
      ),
    );
  }
}
Output:

Conclusion:
In this guide, we’ve demonstrated how to implement a spider chart in Flutter using the spider_chart package. The example app displays a spider chart with data representing different subjects and their respective values. You can customize the chart appearance, colors, and other properties according to your application’s needs. Explore additional features provided by the spider_chart package to enhance your spider chart implementation in Flutter.


