Introduction
A tab bar with multiple tabs is a common UI component used to organize content and provide navigation between different sections of an app. Each tab represents a distinct screen or category, allowing users to switch between them easily. In this tutorial, we will learn how to add a tab bar with multiple tabs in Flutter and explore various customization options.
Content
Step 1. Create a new Flutter project:
Before we begin, ensure that you have Flutter installed and set up on your machine. Create a new Flutter project using the following command in your terminal:
flutter create tab_bar_example
Step 3. Implement the tab bar widget
Inside the lib folder, open the main.dart file. Replace the existing code with the following:
import 'package:flutter/material.dart';

void main() {
  runApp(MyApp());
}

class MyApp extends StatelessWidget {
  @override
  Widget build(BuildContext context) {
    return MaterialApp(
      title: 'Tab Bar Example',
      theme: ThemeData(primarySwatch: Colors.blue),
      home: MyHomePage(),
    );
  }
}

class MyHomePage extends StatefulWidget {
  @override
  _MyHomePageState createState() => _MyHomePageState();
}

class _MyHomePageState extends State<MyHomePage> with SingleTickerProviderStateMixin {
  TabController _tabController;

  @override
  void initState() {
    super.initState();
    _tabController = TabController(length: 3, vsync: this);
  }

  @override
  void dispose() {
    _tabController.dispose();
    super.dispose();
  }

  @override
  Widget build(BuildContext context) {
    return Scaffold(
      appBar: AppBar(
        title: Text('Tab Bar with Multiple Tabs'),
        bottom: TabBar(
          controller: _tabController,
          tabs: [
            Tab(text: 'Tab 1'),
            Tab(text: 'Tab 2'),
            Tab(text: 'Tab 3'),
          ],
        ),
      ),
      body: TabBarView(
        controller: _tabController,
        children: [
          Center(child: Text('Content for Tab 1')),
          Center(child: Text('Content for Tab 2')),
          Center(child: Text('Content for Tab 3')),
        ],
      ),
    );
  }
}
Step 3. Customize the tab bar
In the above code, we have implemented a tab bar with three tabs. You can customize the tab bar further by adding more tabs or modifying the appearance using different properties available in the TabBar and Tab widgets. Additionally, you can define the content for each tab in the TabBarView widget.
Step 4. Run the app
Save the changes and run the app using the following command in the terminal:
flutter run
Sample Code:
import 'package:flutter/material.dart';

void main() {
  runApp(MyApp());
}

class MyApp extends StatelessWidget {
  @override
  Widget build(BuildContext context) {
    return MaterialApp(
      title: 'Tab Bar Demo',
      theme: ThemeData(
        primarySwatch: Colors.blue,
      ),
      home: MyScreen(),
    );
  }
}

class MyScreen extends StatelessWidget {
  @override
  Widget build(BuildContext context) {
    return DefaultTabController(
      length: 3, // Number of tabs
      child: Scaffold(
        appBar: AppBar(
          title: Text('Tab Bar Demo'),
          bottom: TabBar(
            tabs: [
              Tab(text: 'Tab 1'),
              Tab(text: 'Tab 2'),
              Tab(text: 'Tab 3'),
            ],
          ),
        ),
        body: TabBarView(
          children: [
            Center(child: Text('Tab 1 content')),
            Center(child: Text('Tab 2 content')),
            Center(child: Text('Tab 3 content')),
          ],
        ),
      ),
    );
  }
}
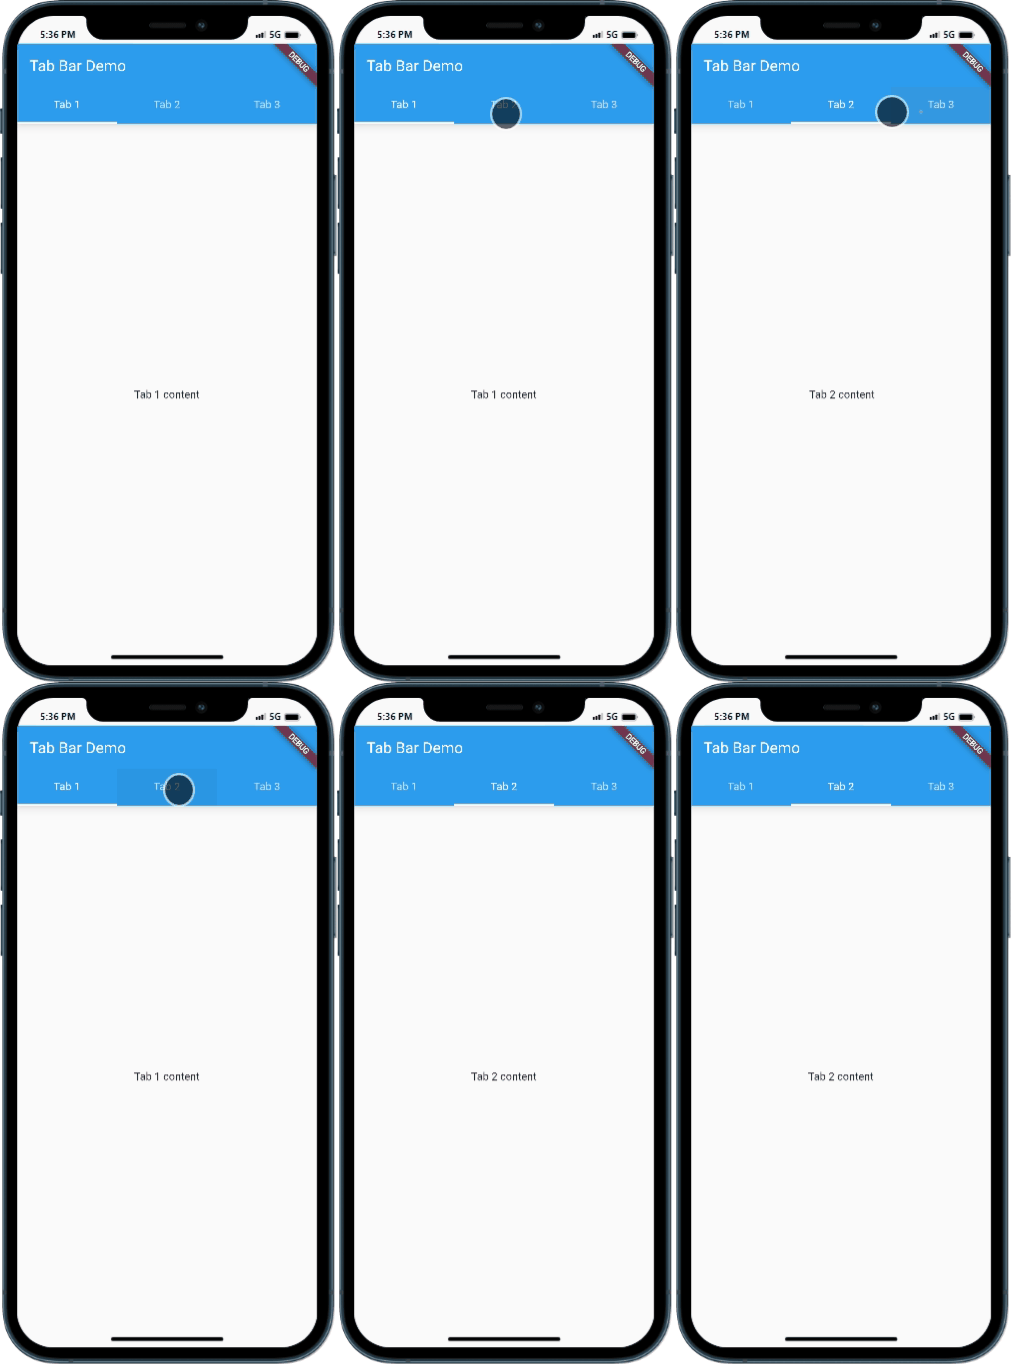
Output:

Conclusion:
Congratulations! You have successfully added a tab bar with multiple tabs to your Flutter app. By following the steps outlined in this tutorial, you learned how to create a new Flutter project, implement the tab bar widget, customize the tabs, and define the content for each tab. Now you can create dynamic and interactive user interfaces with multiple sections or screens, enhancing the user experience of your app.


