Introduction
A drawer navigation menu is a common UI pattern used to provide access to app navigation and additional functionality. It typically appears from the side of the screen when triggered, allowing users to navigate between different screens or access settings. In this tutorial, we will learn how to add a drawer navigation menu in Flutter and explore various customization options.
Content
Step 1. Create a new Flutter project:
Before we begin, ensure that you have Flutter installed and set up on your machine. Create a new Flutter project using the following command in your terminal:
flutter create drawer_example
Step 2. Implement the drawer widget:
Inside the lib folder, open the main.dart file. Replace the existing code with the following:
import 'package:flutter/material.dart';

void main() {
  runApp(MyApp());
}

class MyApp extends StatelessWidget {
  @override
  Widget build(BuildContext context) {
    return MaterialApp(
      title: 'Drawer Navigation Example',
      theme: ThemeData(primarySwatch: Colors.blue),
      home: MyHomePage(),
    );
  }
}

class MyHomePage extends StatelessWidget {
  @override
  Widget build(BuildContext context) {
    return Scaffold(
      appBar: AppBar(
        title: Text('Drawer Navigation'),
      ),
      drawer: Drawer(
        child: ListView(
          padding: EdgeInsets.zero,
          children: [
            DrawerHeader(
              decoration: BoxDecoration(
                color: Colors.blue,
              ),
              child: Text(
                'Drawer Header',
                style: TextStyle(
                  color: Colors.white,
                  fontSize: 24,
                ),
              ),
            ),
            ListTile(
              title: Text('Item 1'),
              onTap: () {
                // Handle item 1 tap
              },
            ),
            ListTile(
              title: Text('Item 2'),
              onTap: () {
                // Handle item 2 tap
              },
            ),
          ],
        ),
      ),
      body: Center(
        child: Text('Content goes here'),
      ),
    );
  }
}
Step 3.Customize the drawer:
onTap callbacks to define the actions when a menu item is tapped.
Step 4.Run the app:
Save the changes and run the app using the following command in the terminal:
flutter run
Sample Code:
import 'package:flutter/material.dart';

void main() {
  runApp(MyApp());
}

class MyApp extends StatelessWidget {
  @override
  Widget build(BuildContext context) {
    return MaterialApp(
      title: 'Drawer Navigation Demo',
      theme: ThemeData(
        primarySwatch: Colors.blue,
      ),
      home: MyScreen(),
    );
  }
}

class MyScreen extends StatelessWidget {
  @override
  Widget build(BuildContext context) {
    return Scaffold(
      appBar: AppBar(
        title: Text('Drawer Navigation Demo'),
      ),
      drawer: Drawer(
        child: ListView(
          padding: EdgeInsets.zero,
          children: [
            DrawerHeader(
              decoration: BoxDecoration(
                color: Colors.blue,
              ),
              child: Text(
                'Drawer Header',
                style: TextStyle(
                  color: Colors.white,
                  fontSize: 24,
                ),
              ),
            ),
            ListTile(
              leading: Icon(Icons.home),
              title: Text('Home'),
              onTap: () {
                // Handle menu item tap
                Navigator.pop(context); // Close the drawer
                // Navigate to the Home screen
              },
            ),
            ListTile(
              leading: Icon(Icons.settings),
              title: Text('Settings'),
              onTap: () {
                // Handle menu item tap
                Navigator.pop(context); // Close the drawer
                // Navigate to the Settings screen
              },
            ),
          ],
        ),
      ),
      body: Center(
        child: Text('Home Screen'),
      ),
    );
  }
}
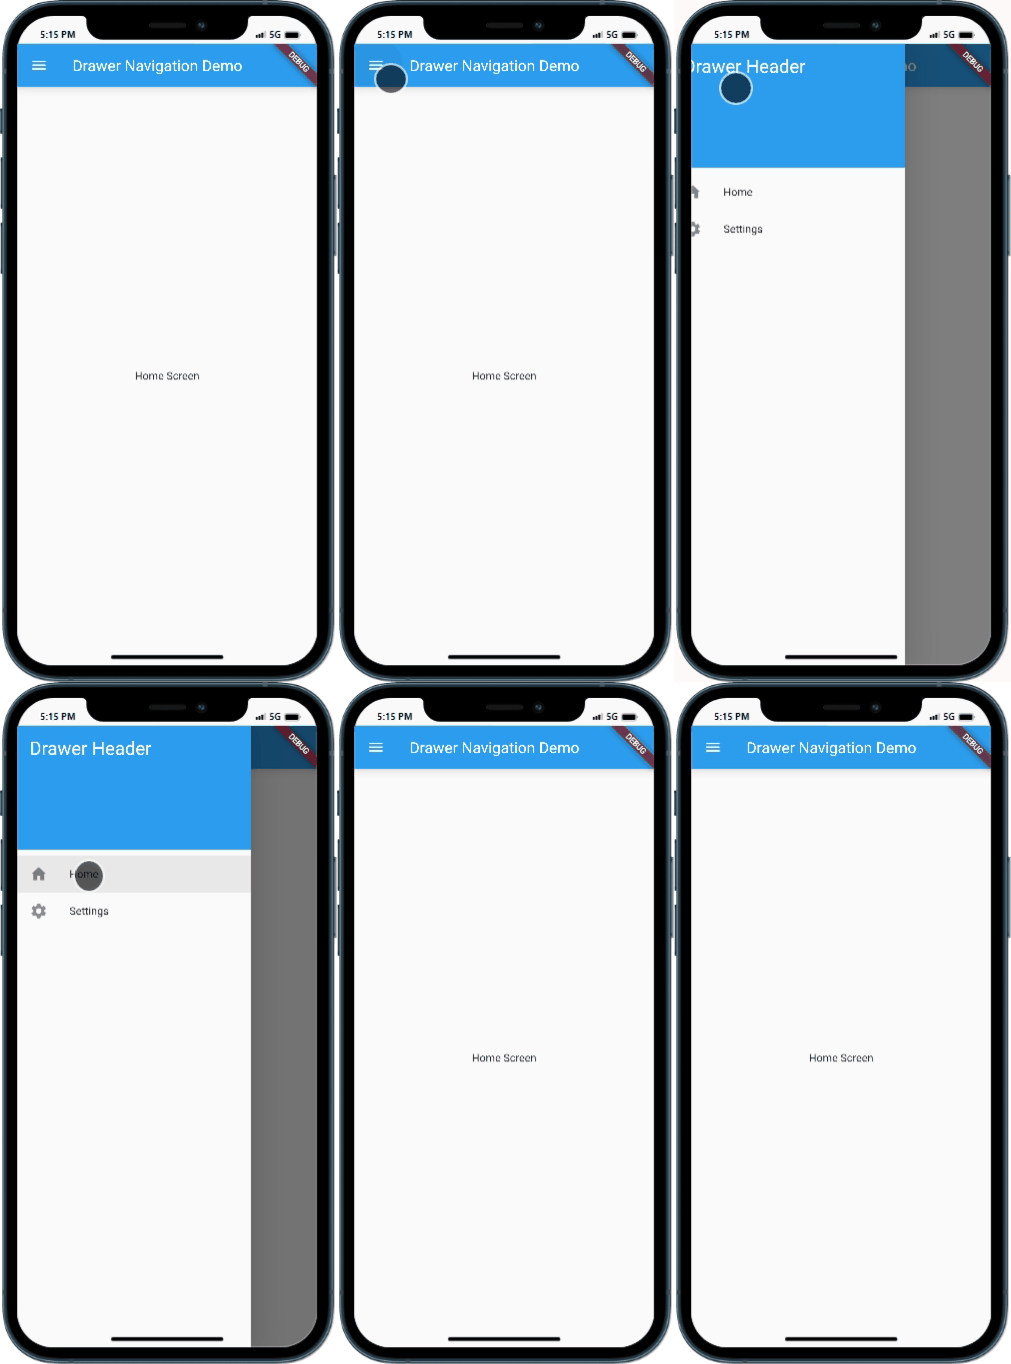
Output:

Conclusion:
Congratulations! You have successfully added a drawer navigation menu to your Flutter app. By following the steps outlined in this tutorial, you learned how to create a new Flutter project, implement the drawer widget, customize the drawer with header and list items, and run the app to see the navigation menu in action. Now you can provide users with an intuitive and convenient way to navigate through your app and access additional features.


