Introduction:
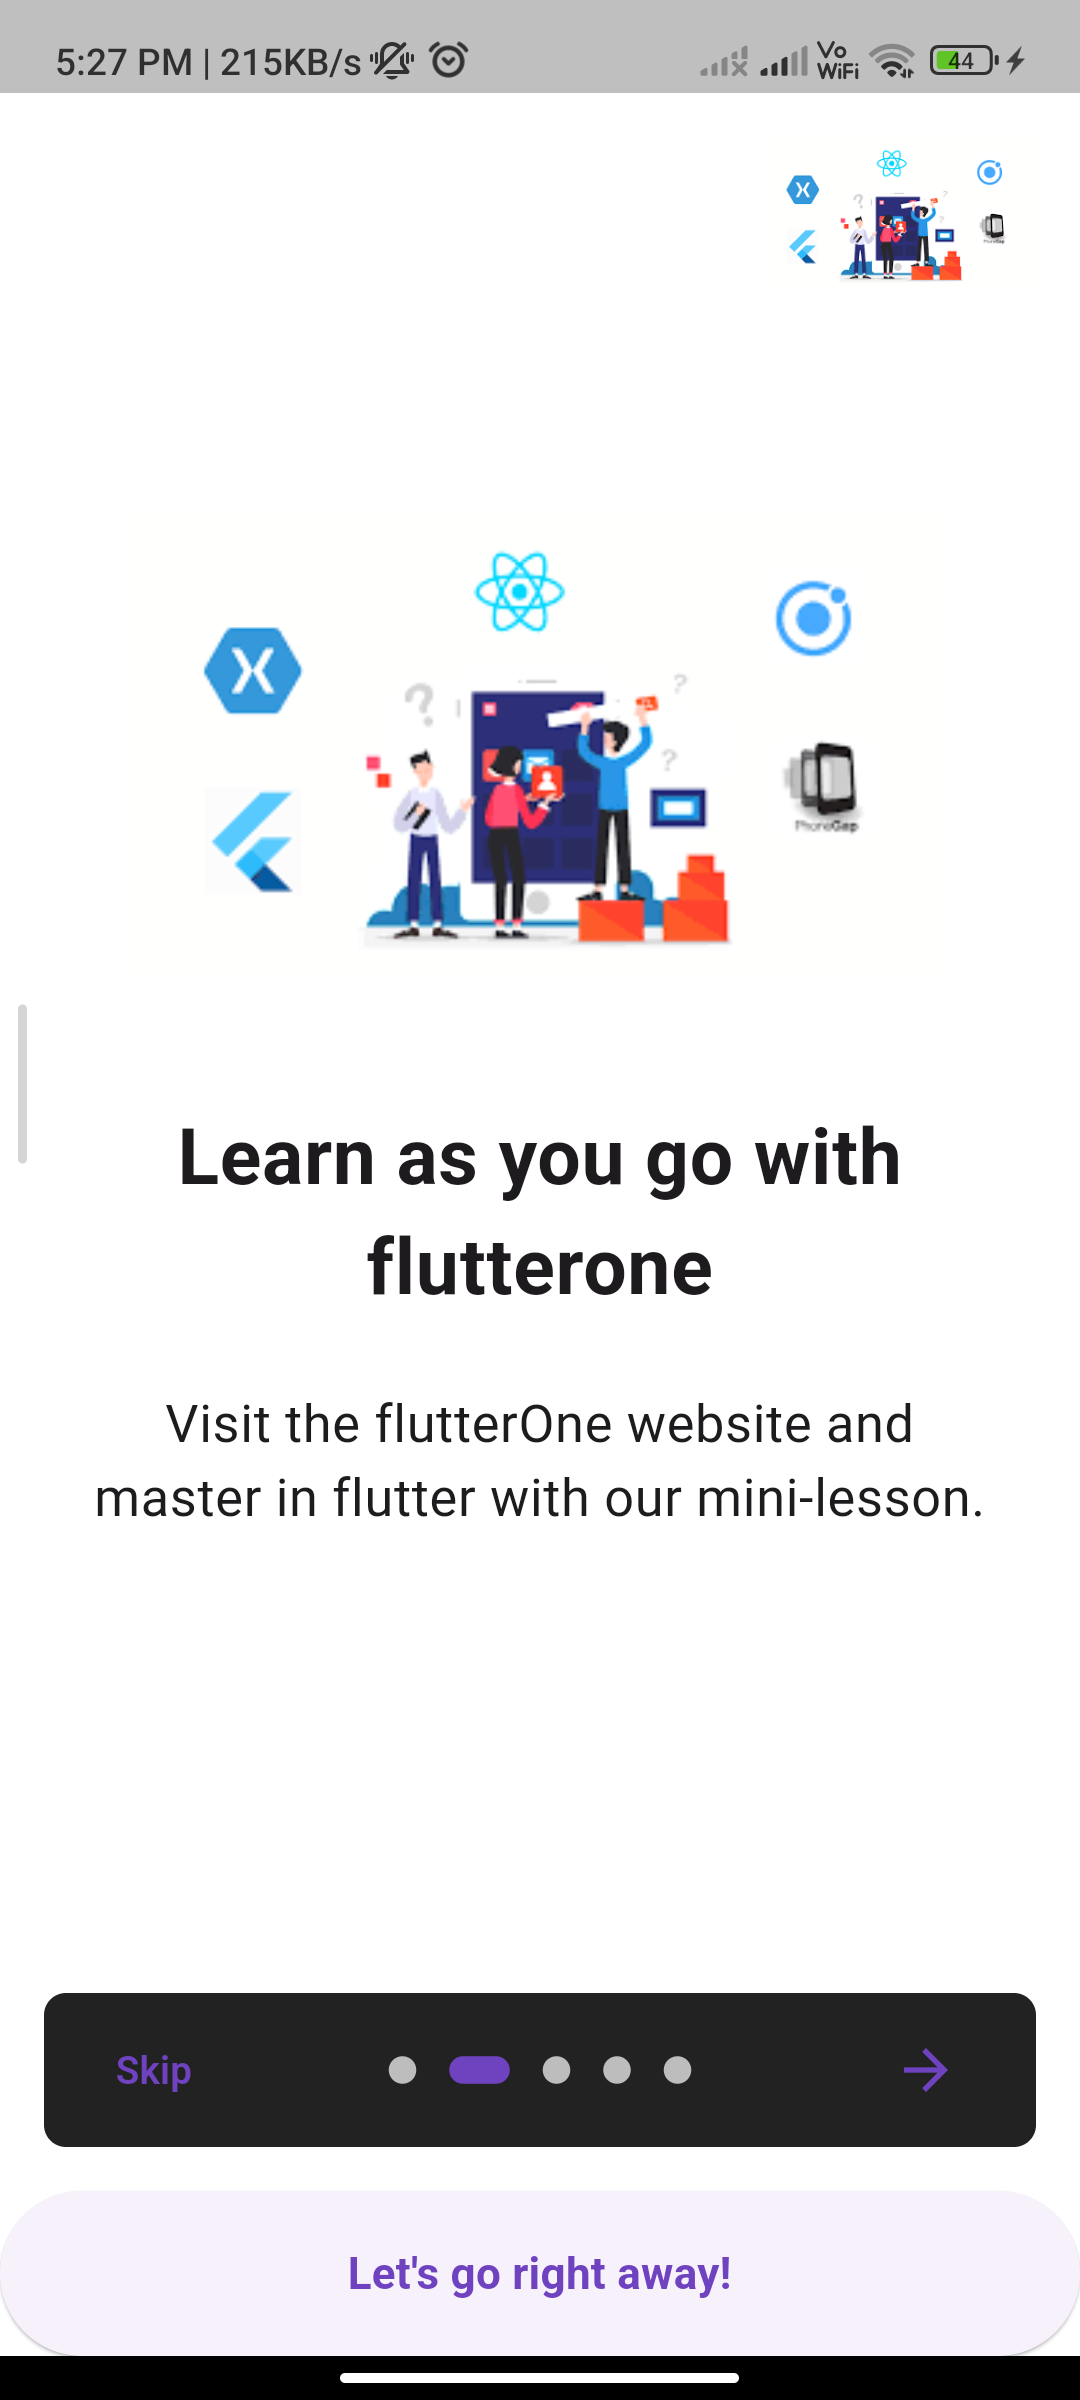
Onboarding screens are a crucial component of mobile apps that provide users with an introduction to the app’s features and functionality. The introduction_screen package in Flutter allows you to easily create customizable onboarding screens to guide users through the app’s key features and benefits.
Content:
1. Add Dependency:
Begin by adding the introduction_screen package to your pubspec.yaml file. This ensures that your Flutter project can access the functionalities provided by the package.
dependencies:
flutter:
sdk: flutter
introduction_screen: ^2.0.0
Run the following command in your terminal to fetch the package
flutter pub get
2. Import Package:
Import the introduction_screen package in the Dart file where you want to implement the onboarding screens. This allows you to utilize the IntroductionScreen widget provided by the package.
import 'package:flutter/material.dart';
import 'package:introduction_screen/introduction_screen.dart';
3. Implement Onboarding Screens:
Define the content for each onboarding screen by creating a list of PageViewModel objects. Each PageViewModel represents a single screen with text, images, and other customizable elements.
final List<PageViewModel> pages = [
  PageViewModel(
    title: "Welcome to MyApp",
    body: "A simple and intuitive app to help you get started.",
    image: Image.asset("assets/images/onboarding1.png"),
    decoration: const PageDecoration(
      pageColor: Colors.blue,
    ),
  ),
  PageViewModel(
    title: "Discover",
    body: "Explore the amazing features of MyApp.",
    image: Image.asset("assets/images/onboarding2.png"),
    decoration: const PageDecoration(
      pageColor: Colors.green,
    ),
  ),
  // Add more PageViewModel objects as needed
];
4. Create Introduction Screen:
Use the IntroductionScreen widget to create the onboarding screen layout. Pass the list of PageViewModel objects as the pages parameter to display the content.
class OnboardingScreen extends StatelessWidget {
  @override
  Widget build(BuildContext context) {
    return IntroductionScreen(
      pages: pages,
      onDone: () {
        // Navigate to the next screen or perform any desired action
      },
      onSkip: () {
        // Navigate to the next screen or perform any desired action
      },
      done: const Text("Done"),
      skip: const Text("Skip"),
    );
  }
}
5. Customize Onboarding Screen:
Customize the appearance and behavior of the onboarding screen by adjusting parameters such as text styles, button labels, page indicators, etc., according to your app’s design requirements.
6. Handle User Actions:
Implement the onDone and onSkip callbacks to define the actions that should be taken when the user completes or skips the onboarding screens, respectively.
7. Run the Application:
After implementing the onboarding screens, run your Flutter application on a device or emulator to observe the onboarding experience. This allows you to test its functionality and ensure that users can navigate through the screens smoothly.
flutter run
Sample Code:
import 'package:flutter/foundation.dart';
import 'package:flutter/material.dart';
import 'package:flutter/services.dart';
import 'package:introduction_screen/introduction_screen.dart';

class OnBoardingPage extends StatefulWidget {
  const OnBoardingPage({Key? key}) : super(key: key);

  @override
  OnBoardingPageState createState() => OnBoardingPageState();
}

class OnBoardingPageState extends State<OnBoardingPage> {
  final introKey = GlobalKey<IntroductionScreenState>();

  void _onIntroEnd(context) {
    Navigator.of(context).pushReplacement(
      MaterialPageRoute(builder: (_) => const HomePage()),
    );
  }

  Widget _buildFullscreenImage() {
    return Image.network(
      'https://encrypted-tbn0.gstatic.com/images?q=tbn:ANd9GcQrDP8oqnRWUDH9Ceu9hptYwoOTdWgSze-oZw&usqp=CAU',
      fit: BoxFit.contain,
      height: double.infinity,
      width: double.infinity,
      alignment: Alignment.center,
    );
  }

  Widget _buildImage(String assetName, [double width = 350]) {
    return Image.network(
        'https://encrypted-tbn0.gstatic.com/images?q=tbn:ANd9GcQn1stBX0ReyEaqdRrnYqvdwWbU2uKAwQKBBfZ6Q6tJcQePO8-UFzTsyPACUrBBi-OJzj0&usqp=CAU',
        width: width);
  }

  @override
  Widget build(BuildContext context) {
    const bodyStyle = TextStyle(fontSize: 19.0);

    const pageDecoration = PageDecoration(
      titleTextStyle: TextStyle(fontSize: 28.0, fontWeight: FontWeight.w700),
      bodyTextStyle: bodyStyle,
      bodyPadding: EdgeInsets.fromLTRB(16.0, 0.0, 16.0, 16.0),
      pageColor: Colors.white,
      imagePadding: EdgeInsets.zero,
    );

    return IntroductionScreen(
      key: introKey,
      globalBackgroundColor: Colors.white,
      allowImplicitScrolling: true,
      autoScrollDuration: 3000,
      infiniteAutoScroll: true,
      globalHeader: Align(
        alignment: Alignment.topRight,
        child: SafeArea(
          child: Padding(
            padding: const EdgeInsets.only(top: 16, right: 16),
            child: _buildImage('flutter.png', 100),
          ),
        ),
      ),
      globalFooter: SizedBox(
        width: double.infinity,
        height: 60,
        child: ElevatedButton(
          child: const Text(
            'Let\'s go right away!',
            style: TextStyle(fontSize: 16.0, fontWeight: FontWeight.bold),
          ),
          onPressed: () => _onIntroEnd(context),
        ),
      ),
      pages: [
        PageViewModel(
          title: "Fractional shares",
          body: "Instead of having to buy an entire share, invest any amount you want.",
          image: _buildImage('img1.jpg'),
          decoration: pageDecoration,
        ),
        PageViewModel(
          title: "Learn as you go",
          body: "Download the Stockpile app and master the market with our mini-lesson.",
          image: _buildImage('img2.jpg'),
          decoration: pageDecoration,
        ),

        PageViewModel(
          title: "Full Screen Page",
          body:
              "Pages can be full screen as well.\n\nLorem ipsum dolor sit amet, consectetur adipiscing elit. Nunc id euismod lectus, non tempor felis. Nam rutrum rhoncus est ac venenatis.",
          image: _buildFullscreenImage(),
          decoration: pageDecoration.copyWith(
            contentMargin: const EdgeInsets.symmetric(horizontal: 16),
            fullScreen: true,
            bodyFlex: 2,
            imageFlex: 3,
            safeArea: 100,
          ),
        ),
        PageViewModel(
          title: "Another title page",
          body: "Another beautiful body text for this example onboarding",
          image: _buildImage('img2.jpg'),
          footer: ElevatedButton(
            onPressed: () {
              introKey.currentState?.animateScroll(0);
            },
            style: ElevatedButton.styleFrom(
              backgroundColor: Colors.lightBlue,
              shape: RoundedRectangleBorder(
                borderRadius: BorderRadius.circular(8.0),
              ),
            ),
            child: const Text(
              'FooButton',
              style: TextStyle(color: Colors.white),
            ),
          ),
          decoration: pageDecoration.copyWith(
            bodyFlex: 6,
            imageFlex: 6,
            safeArea: 80,
          ),
        ),
        PageViewModel(
          title: "Title of last page - reversed",
          bodyWidget: const Row(
            mainAxisAlignment: MainAxisAlignment.center,
            children: [
              Text("Click on ", style: bodyStyle),
              Icon(Icons.edit),
              Text(" to edit a post", style: bodyStyle),
            ],
          ),
          decoration: pageDecoration.copyWith(
            bodyFlex: 2,
            imageFlex: 4,
            bodyAlignment: Alignment.bottomCenter,
            imageAlignment: Alignment.topCenter,
          ),
          image: _buildImage('img1.jpg'),
          reverse: true,
        ),
      ],
      onDone: () => _onIntroEnd(context),
      onSkip: () => _onIntroEnd(context), // You can override onSkip callback
      showSkipButton: true,
      skipOrBackFlex: 0,
      nextFlex: 0,
      showBackButton: false,
      //rtl: true, // Display as right-to-left
      back: const Icon(Icons.arrow_back),
      skip: const Text('Skip', style: TextStyle(fontWeight: FontWeight.w600)),
      next: const Icon(Icons.arrow_forward),
      done: const Text('Done', style: TextStyle(fontWeight: FontWeight.w600)),
      curve: Curves.fastLinearToSlowEaseIn,
      controlsMargin: const EdgeInsets.all(16),
      controlsPadding: kIsWeb ? const EdgeInsets.all(12.0) : const EdgeInsets.fromLTRB(8.0, 4.0, 8.0, 4.0),
      dotsDecorator: const DotsDecorator(
        size: Size(10.0, 10.0),
        color: Color(0xFFBDBDBD),
        activeSize: Size(22.0, 10.0),
        activeShape: RoundedRectangleBorder(
          borderRadius: BorderRadius.all(Radius.circular(25.0)),
        ),
      ),
      dotsContainerDecorator: const ShapeDecoration(
        color: Colors.black87,
        shape: RoundedRectangleBorder(
          borderRadius: BorderRadius.all(Radius.circular(8.0)),
        ),
      ),
    );
  }
}

class HomePage extends StatelessWidget {
  const HomePage({Key? key}) : super(key: key);

  @override
  Widget build(BuildContext context) {
    return Scaffold(
      appBar: AppBar(title: const Text('Home')),
      body: const Center(child: Text("This is the screen after Introduction")),
    );
  }
}
Output:

Conclusion:
Integrating onboarding screens into your Flutter app using the introduction_screen package is an effective way to introduce users to the app’s features and benefits. By following the steps outlined in this guide and customizing the onboarding screen content and appearance as needed, you can create a compelling onboarding experience that engages and informs users effectively. Experiment with different configurations and explore the package’s features to tailor the onboarding screens to your app’s specific requirements.
This structured approach to implementing onboarding screens ensures that you can efficiently leverage the introduction_screen package’s capabilities in your Flutter app, enhancing user engagement and retention from the very beginning.


