Introduction:
QR code scanning is a popular feature in many mobile apps, allowing users to scan QR codes and retrieve relevant information or perform specific actions. In Flutter, you can implement a QR scanner to enable this functionality in your app. QR codes are commonly used for various applications, such as product promotion, ticketing systems, authentication, and more. In this step-by-step guide, you will learn how to implement a QR scanner in Flutter using the qr_code_scanner package. By following this tutorial, you will be able to integrate QR code scanning functionality into your Flutter app and leverage the data retrieved from scanned QR codes.


Content:
1. Set up a new Flutter project:
Ensure that you have Flutter installed and set up on your machine. Create a new Flutter project using the following command in your terminal:
flutter create qr_scanner_app
2. Add the qr_code_scanner package:
Open the pubspec.yaml file in your Flutter project and add the qr_code_scanner package as a dependency:
dependencies:
  qr_code_scanner: ^0.5.2
Save the file and run the following command in your terminal to fetch the package:
flutter pub get
3. Import the necessary packages:
In the Dart file where you want to implement the QR scanner, import the necessary packages:
import 'package:flutter/material.dart';
import 'package:qr_code_scanner/qr_code_scanner.dart';
4. Implement the QR scanning functionality:
To implement the QR scanner, define a QRViewController and a QRView widget. Set up the QRView widget to display the camera feed and handle scanning events. Here’s an example:
class QRScannerScreen extends StatefulWidget {
  @override
  _QRScannerScreenState createState() => _QRScannerScreenState();
}

class _QRScannerScreenState extends State<QRScannerScreen> {
  final GlobalKey qrKey = GlobalKey(debugLabel: 'QR');
  QRViewController? controller;
  String scannedData = '';

  @override
  Widget build(BuildContext context) {
    return Scaffold(
      appBar: AppBar(
        title: Text('QR Scanner'),
      ),
      body: Column(
        children: [
          Expanded(
            flex: 5,
            child: QRView(
              key: qrKey,
              onQRViewCreated: _onQRViewCreated,
            ),
          ),
          Expanded(
            flex: 1,
            child: Center(
              child: Text(scannedData),
            ),
          ),
        ],
      ),
    );
  }

  void _onQRViewCreated(QRViewController controller) {
    this.controller = controller;
    controller.scannedDataStream.listen((scanData) {
      setState(() {
        scannedData = scanData.code;
      });
    });
  }

  @override
  void dispose() {
    controller?.dispose();
    super.dispose();
  }
}
5. Navigate to the QR scanner screen:
In your app’s navigation flow, navigate to the QR scanner screen when the user triggers the QR code scanning feature. You can use a button or any other user interaction to navigate to the screen.
6. Process the scanned QR code data:
In the _onQRViewCreated method, the scannedDataStream stream provides the scanned QR code data. Update the scannedData variable with the scanned QR code value and display it on the screen or process it as per your app’s requirements.
Sample Code:
import 'package:flutter/material.dart';
import 'package:qr_code_scanner/qr_code_scanner.dart';

void main() {
  runApp(QRScannerApp());
}

class QRScannerApp extends StatelessWidget {
  @override
  Widget build(BuildContext context) {
    return MaterialApp(
      home: QRScannerScreen(),
    );
  }
}

class QRScannerScreen extends StatefulWidget {
  @override
  _QRScannerScreenState createState() => _QRScannerScreenState();
}

class _QRScannerScreenState extends State<QRScannerScreen> {
  final GlobalKey qrKey = GlobalKey(debugLabel: 'QR');
  QRViewController? controller;
  String qrText = "";

  @override
  Widget build(BuildContext context) {
    return Scaffold(
      appBar: AppBar(
        title: Text(
          'Implementing a QR Scanner Using Flutter: A Guide by a Seasoned Developer',
          style: TextStyle(fontWeight: FontWeight.bold),
        ),
      ),
      body: Column(
        children: [
          Expanded(
            flex: 2,
            child: Container(

              margin: EdgeInsets.symmetric(horizontal: 25,vertical: 20),
              child: QRView(
                key: qrKey,
                onQRViewCreated: _onQRViewCreated,
              ),
            ),
          ),
          Expanded(
            flex: 3,
            child: Center(
              child: Column(
                mainAxisAlignment: MainAxisAlignment.center,
                children: [
                  Text(
                    'Scanned Data:',
                    style: TextStyle(fontSize: 18, fontWeight: FontWeight.bold),
                  ),
                  SizedBox(height: 10),
                  Text(
                    qrText,
                    style: TextStyle(fontSize: 24),
                  ),
                ],
              ),
            ),
          ),
        ],
      ),
    );
  }

  void _onQRViewCreated(QRViewController controller) {
    this.controller = controller;
    controller.scannedDataStream.listen((scanData) {
      setState(() {
        qrText = scanData.code!;
      });
    });
  }

  @override
  void dispose() {
    controller?.dispose();
    super.dispose();
  }
}
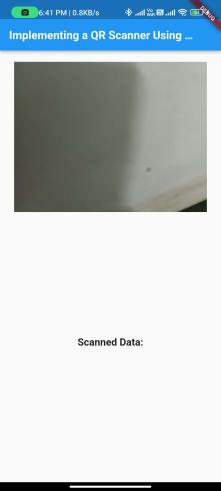
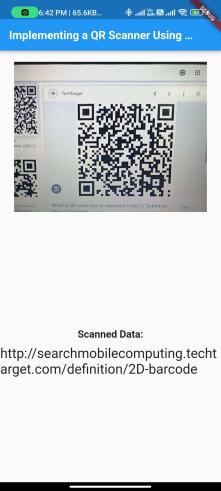
Output:


Conclusion:
Congratulations! You have successfully learned how to implement a QR scanner in a Flutter app. By following this step-by-step guide, you can now integrate QR code scanning functionality using the qr_code_scanner package in Flutter. QR code scanning is a versatile feature that can enhance various applications, enabling users to quickly retrieve information or perform specific actions. Leverage QR code scanning in your Flutter app to provide a seamless and convenient user experience.


