Introduction:
In a Flutter app, it’s common to display or hide widgets dynamically based on certain conditions. This allows you to control the visibility of widgets and provide a more interactive user experience. Whether you want to show or hide a widget based on a boolean condition or any other condition, Flutter provides you with the flexibility to achieve this behavior. In this step-by-step guide, you will learn how to show or hide a widget based on a condition in a Flutter app. Additionally, you will create a button that can toggle the visibility of the widget dynamically.

Content:
1. Set up a new Flutter project:
Ensure that you have Flutter installed and set up on your machine. Create a new Flutter project using the following command in your terminal:
flutter create widget_visibility_app
2. Implement conditional widget visibility:
In the Dart file where you want to implement the conditional widget visibility, import the necessary packages:
import 'package:flutter/material.dart';
Inside the build method of your widget, define a boolean variable to track the visibility of the widget:
bool isWidgetVisible = true; // Set the initial visibility state
Next, create the widget that you want to conditionally show or hide:
Widget myWidget = Container(
  width: 200,
  height: 200,
  color: Colors.blue,
);
Finally, use the Visibility widget to conditionally show or hide the widget based on the boolean variable:
Visibility(
  visible: isWidgetVisible, // Set the visibility based on the boolean condition
  child: myWidget,
)
3. Implement a button to control widget visibility:
Inside the build method of your widget, create a button widget that can toggle the visibility of the widget dynamically:
ElevatedButton(
  onPressed: () {
    setState(() {
      isWidgetVisible = !isWidgetVisible; // Toggle the visibility state on button press
    });
  },
  child: Text('Toggle Widget Visibility'),
)
4. Use the conditional widget visibility in your app:
In the Dart file where you want to use the conditional widget visibility, import the necessary packages and add the visibility widget and button widget to your widget tree.
import 'package:flutter/material.dart';

class MyScreen extends StatefulWidget {
  @override
  _MyScreenState createState() => _MyScreenState();
}

class _MyScreenState extends State<MyScreen> {
  bool isWidgetVisible = true;

  Widget myWidget = Container(
    width: 200,
    height: 200,
    color: Colors.blue,
  );

  @override
  Widget build(BuildContext context) {
    return Scaffold(
      body: Column(
        mainAxisAlignment: MainAxisAlignment.center,
        children: [
          Visibility(
            visible: isWidgetVisible,
            child: myWidget,
          ),
          SizedBox(height: 16),
          ElevatedButton(
            onPressed: () {
              setState(() {
                isWidgetVisible = !isWidgetVisible;
              });
            },
            child: Text('Toggle Widget Visibility'),
          ),
        ],
      ),
    );
  }
}
5. Test the conditional widget visibility:
Save your changes and run the app using the following command in your terminal:
flutter run
6. Observe the conditional widget visibility in action:
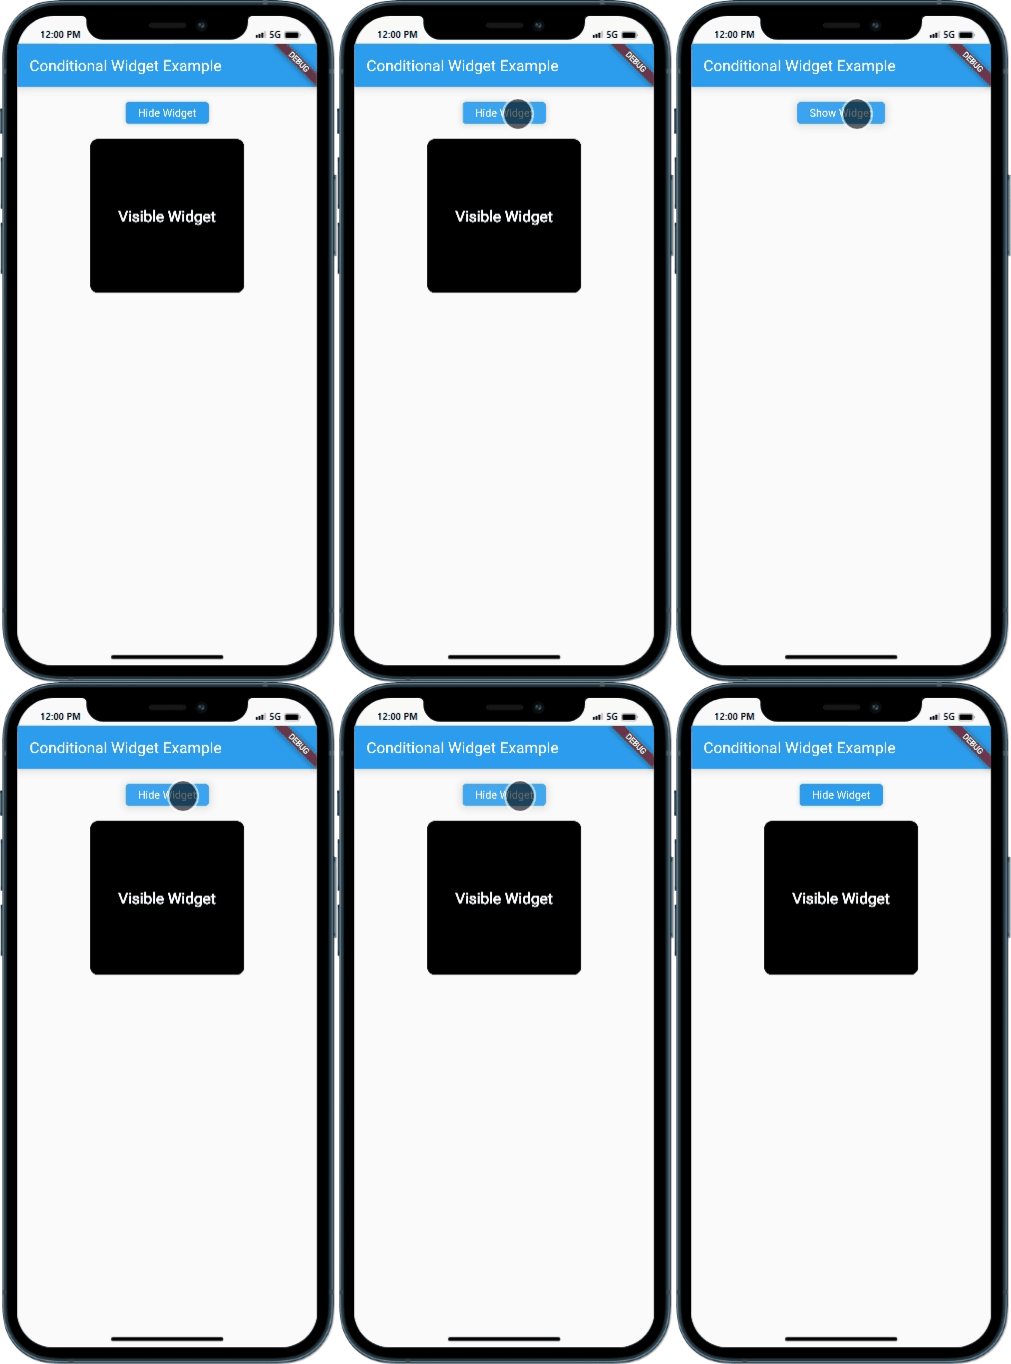
Upon running the app, you will see the widget initially visible. Pressing the “Toggle Widget Visibility” button will dynamically show or hide the widget based on the visibility state. The visibility of the widget will be updated dynamically as you interact with the button.
Sample Code:
import 'package:flutter/material.dart';

class ConditionalWidgetExample extends StatefulWidget {
  @override
  _ConditionalWidgetExampleState createState() => _ConditionalWidgetExampleState();
}

class _ConditionalWidgetExampleState extends State<ConditionalWidgetExample> {
  bool shouldShowWidget = true;

  void toggleWidgetVisibility() {
    setState(() {
      shouldShowWidget = !shouldShowWidget;
    });
  }

  @override
  Widget build(BuildContext context) {
    return Scaffold(
      appBar: AppBar(
        title: Text('Conditional Widget Example'),
      ),
      body: Center(
        child: Column(
          crossAxisAlignment:CrossAxisAlignment.center,
          mainAxisAlignment:  MainAxisAlignment.  start,
          children: [
              SizedBox(height: 20,),
            ElevatedButton(
              onPressed: toggleWidgetVisibility,
              child: Text(shouldShowWidget ? 'Hide Widget' : 'Show Widget'),
            ),
            SizedBox(height: 20,),
            Visibility(
              visible: shouldShowWidget,
              child: Container(
                decoration: BoxDecoration(
                  borderRadius: BorderRadius.circular(10),
                    color: Colors.   black,

                ),
                width: 200,
                height: 200,

                child: Center(
                  child: Text('Visible Widget',style: TextStyle(
                    fontWeight: FontWeight.w600,
                    fontSize: 20,
                  color: Colors.    white,),),
                ),
              ),
            ),
          ],
        ),
      ),
    );
  }
}

void main() {
  runApp(MaterialApp(
    home: ConditionalWidgetExample(),
  ));
}
Output:

Conclusion:
Congratulations! You have successfully learned how to show or hide widgets based on conditions in a Flutter app. By following this step-by-step guide, you now have the knowledge to implement conditional widget visibility and create a button to dynamically control the visibility of a widget. Utilize this technique in your Flutter app to create interactive UIs that adapt to different conditions and user interactions.


