Introduction:
In a Flutter app, radio buttons provide a convenient way to allow users to select a single option from a group of options. By grouping radio buttons together, you can create a radio button group that enforces the selection of only one option at a time. In this step-by-step guide, you will learn how to create a radio button group for selecting options in a Flutter app. By following this tutorial, you will be able to implement a group of radio buttons with different options and capture the selected option for further processing.

Content:
1. Set up a new Flutter project:
Ensure that you have Flutter installed and set up on your machine. Create a new Flutter project using the following command in your terminal:
flutter create radio_button_group_app
2. Implement a radio button group:
In the Dart file where you want to implement the radio button group, import the necessary packages:
import 'package:flutter/material.dart';
Inside the build method of your widget, define a variable to store the selected option:
String selectedOption;
Create a list of options that will be displayed in the radio button group:
List<String> options = [
  'Option 1',
  'Option 2',
  'Option 3',
];
Use the ListView.builder widget to create the radio button group:
ListView.builder(
  shrinkWrap: true,
  itemCount: options.length,
  itemBuilder: (context, index) {
    return ListTile(
      title: Text(options[index]),
      leading: Radio(
        value: options[index],
        groupValue: selectedOption,
        onChanged: (value) {
          setState(() {
            selectedOption = value;
          });
        },
      ),
    );
  },
)
3. Use the radio button group in your app:
In the Dart file where you want to use the radio button group, import the necessary packages and add the radio button group widget to your widget tree.
import 'package:flutter/material.dart';

class MyScreen extends StatefulWidget {
  @override
  _MyScreenState createState() => _MyScreenState();
}

class _MyScreenState extends State<MyScreen> {
  String selectedOption;
  List<String> options = [
    'Option 1',
    'Option 2',
    'Option 3',
  ];

  @override
  Widget build(BuildContext context) {
    return Scaffold(
      appBar: AppBar(
        title: Text('Radio Button Group'),
      ),
      body: ListView.builder(
        shrinkWrap: true,
        itemCount: options.length,
        itemBuilder: (context, index) {
          return ListTile(
            title: Text(options[index]),
            leading: Radio(
              value: options[index],
              groupValue: selectedOption,
              onChanged: (value) {
                setState(() {
                  selectedOption = value;
                });
              },
            ),
          );
        },
      ),
    );
  }
}
4. Capture the selected option:
To capture the selected option, you can use the selectedOption variable in your Flutter app. You can use this value for further processing, such as updating UI elements or performing specific actions based on the selected option.
5. Test the radio button group:
Save your changes and run the app using the following command in your terminal:
flutter run
6. Select an option from the radio button group:
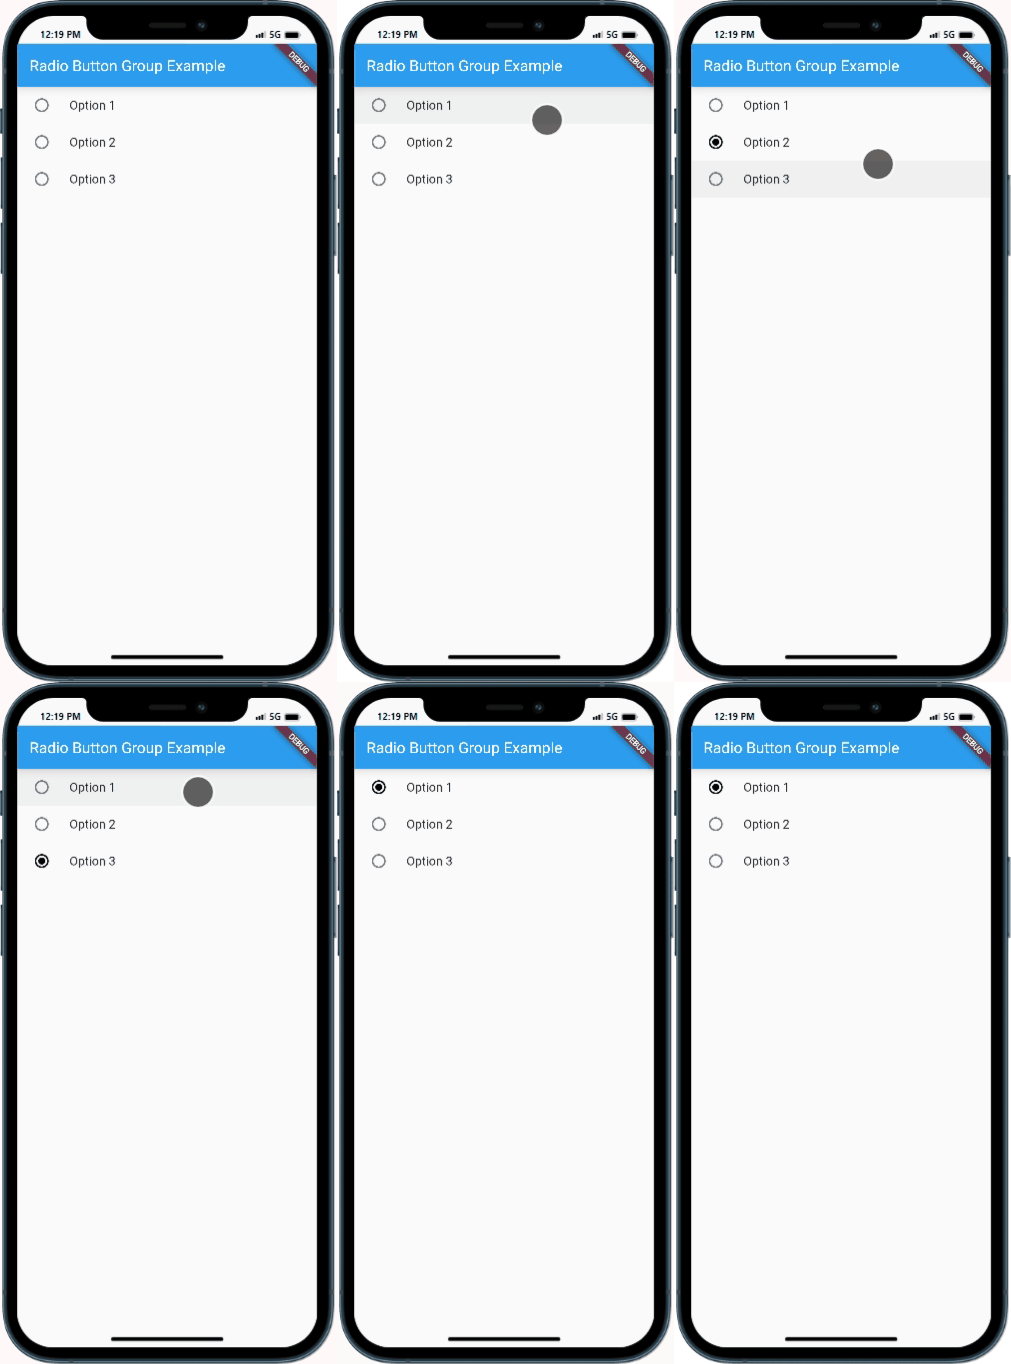
Upon running the app, you will see the radio button group with the provided options. Selecting an option will highlight the selected radio button and update the selectedOption variable accordingly. You can verify the selection by printing the selectedOption variable or utilizing it in other parts of your app.
Sample Code:
import 'package:flutter/material.dart';
import 'package:image/image.dart';

class RadioGroup {
  String text;
  bool isSelected;

  RadioGroup({required this.text, required this.isSelected});
}

class RadioButtonGroupExample extends StatefulWidget {
  @override
  _RadioButtonGroupExampleState createState() => _RadioButtonGroupExampleState();
}

class _RadioButtonGroupExampleState extends State<RadioButtonGroupExample> {
  List<RadioGroup> radioGroups = [
    RadioGroup(text: 'Option 1', isSelected: false),
    RadioGroup(text: 'Option 2', isSelected: false),
    RadioGroup(text: 'Option 3', isSelected: false),
  ];

  void selectOption(int index) {
    setState(() {
      for (int i = 0; i < radioGroups.length; i++) {
        radioGroups[i].isSelected = (i == index);
      }
    });
  }

  @override
  Widget build(BuildContext context) {
    return Scaffold(
      appBar: AppBar(
        title: Text('Radio Button Group Example'),
      ),
      body: ListView.builder(
        itemCount: radioGroups.length,
        itemBuilder: (context, index) {
          return RadioListTile(


            title: Text(radioGroups[index].text),
            value: index,
            groupValue: radioGroups.indexWhere((element) => element.isSelected),
            onChanged: (value) {
              selectOption(value!);
            },
          );
        },
      ),
    );
  }
}

void main() {
  runApp(MaterialApp(
    home: RadioButtonGroupExample(),
  ));
}
Output:

Conclusion:
Congratulations! You have successfully learned how to create a radio button group for selecting options in a Flutter app. By following this step-by-step guide, you now have the knowledge to implement a group of radio buttons with different options and capture the selected option for further processing. Utilize this technique in your Flutter app to provide users with the ability to make single-option selections in an intuitive and user-friendly manner.


